Poor Man's Walnut Border
Creating a Walnut Border With Just Select Red Oak
Installing the Wood Floor
To start installing this oak floor I first dropped a chalkline 18 inches away from the fireplace, stairway, and entryway. I then installed a 1 x 2 pine strip which I bent to follow a chalkline down the center of the room. It had to be perfectly straight. I then installed the flooring to the corner in one direction using the 1 x 2 as the "wall". On each row I made sure the boards went over the chalkline 18 inches from around the perimeter of the room. Once I got to the corner I removed the 1 x 2 starting board, put a spline in the groove which made it a tongue and installed to the opposite corner
Insert Another Sub Header Here
After the boards were all stsined, dry and the Blue tape carefully removed is put three coats of finish over the entire floor. I woui;d add thjat this entire project was done off four large batteries which were kept charged by a large Generac generaltor purchased by the owner right after the Y2k scare at a bargain price.
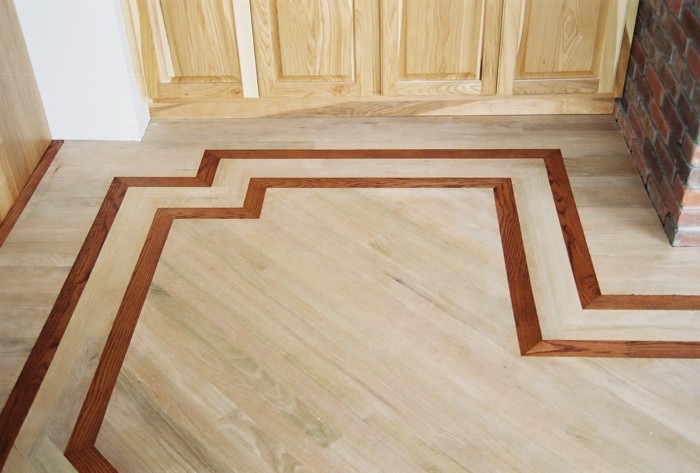
Installing the Border
Once the center was all installed I dropped chalklines around the perimeter of the room 18 inches away from everything minus the distance from the side of my circular saw to the blade. I installed 1 x 2 pine following the chaukline and resting the side of my saw against the 1 x 2 cut 18 inches iff the perimeter of the field. Using a slotting router I put a 1/4 inch groove into the side where I had cut and put in a spline. Thje first board of the border was mitered on the corners. The second and third board were overlapped and the fourth board was mitered I then installed a 9 inch skirt around the perimeter 90 degrees to the border.

This was a very interesting job on the top of a mountain near Columbus, Montana. The cost of running traditional power lines to this house was well pover $100,000 so everything was run off of a very interesting Generator/ Battery/ Inverter system. The well head was a mile from the house and so a trnch was dug a mile long and 6 feet deep to the house from the well head which was also run by a generator. Water was pumped every 2 weeks for the well to the cistern next to the house. Fornunately, the natural gas pipeline for the town below ran through the property and the pipleline people tapped the main line to the house which ran the Generator when the batteries got low as well at the heating, appliances, and hot water. There was a Model A parked in the garage.
Using Blue Tape
After I had sanded the floor I painstakingly put blue tape on both sides of the first and fourth board of the border and stained those boards with walnut stain. I did another job using this technique and stained the first and fourth board of the border sky blue and told the customer he could make up a name for the blue wood LOL.
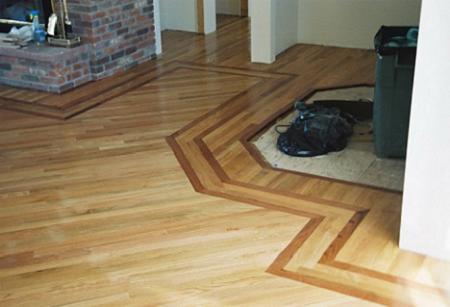
The Dining Room was a Little Tricky
Notice the attention to detail. Not a job for someone without a lot of patience..