Inlaying Wooden Goldfish
Inlaying Wooden Goldfish
This was one of my favorite projects. I watched my wife cut stained glass and realized I could use the same technique with wood. To cut stained glass you take a pen drawing of what you want to create. You then cut on all the lines so you have a lot of pieces. Next you glue stick each peice to the glass the way you want the grain of the glass to go for that piece. Then you grind the glass to match the piece of paper. By repeating the process with each piece they all fit together because the pieces of paper fit together before you cut them. The advantage I had was wood is a lot easier to cut than glass. I found a book at the library with a pen drawing looking straight down from the top that illustrated how Goldfish propell themselves through water. I photoenlarged the pictures to the size of coy. I enlarged the final size slightly to make a template for my router so the pieces would fit perfectly in the relief I routered out. I had two pictures and two templates.
One resembled this " (" and one resembled this "C" and by flipping them over, I had 4 different designs.
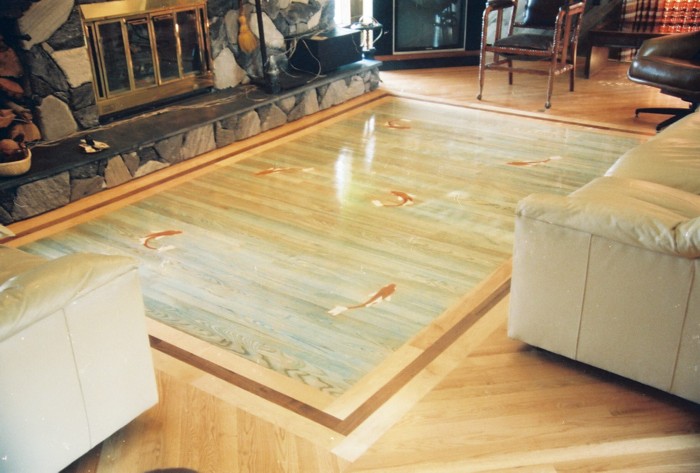
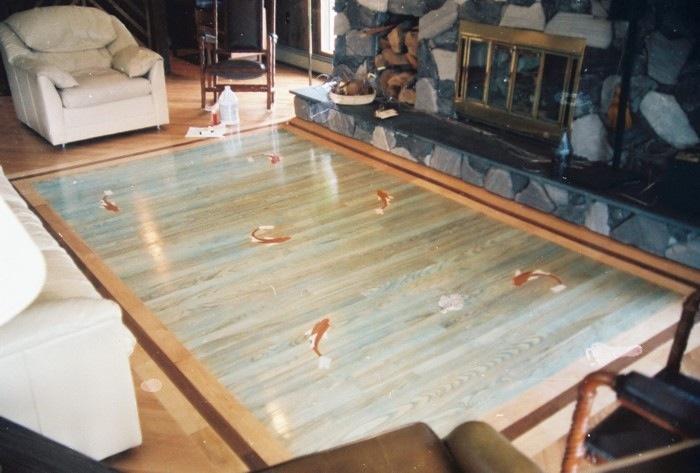
I first installed the Ash which in the picture I eventually pickeled phorescent blue. I penciled in where the templates for the router would be so I wasn't putting nails there for the router bit to hit. The woods involved in this project are Ash, Cherry which I pickeled Phorescent orange for the goldfish, White Oak for the fins which got picleled white. The border was 3 1/4 inch Maple then 2 1/4 inch Walnut and 3 1/4 inch Maple. The balance of the room was select Red Oak mitered in 4 different directions.
Cutting a Groove with the Router
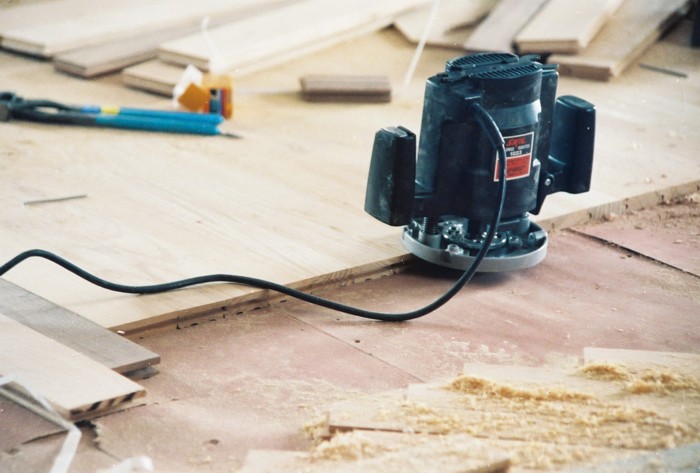
The Router in the the above picture is sitting on the Ash and has a slotting router bit to cut a groove in the side of the Ash where I had cut the Ash all off with my circular saw. This is the same technique I use in the Poor Man's Walnut which is another page on thsi website.
Inserting a spline in the groove so the Ash and Maple are tongue and grooved together
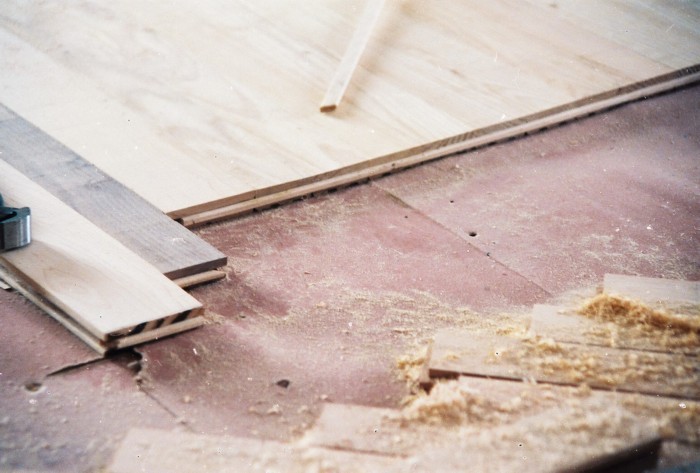
In the above picture there is a spline laying on top of the Ash and on that has been inserted into the groove. This spline get nailed just as if it was a tongue and the Border is then installed.
In case you were wondering what I mean by the term "pickeling" , it is simply using a water based paint of any color you wish, cutting it 50 percent with water and then applying as if it was a stain. After letting it set a bit you wipe off any access and voila you have colored wood with the grain showing. You might want to get small pint samples from Home Depot or Lowes, computer mixed to a desired color. Pour the sample into a slightly larger container then fill the empty sample can with water and pour it in and mix the two.